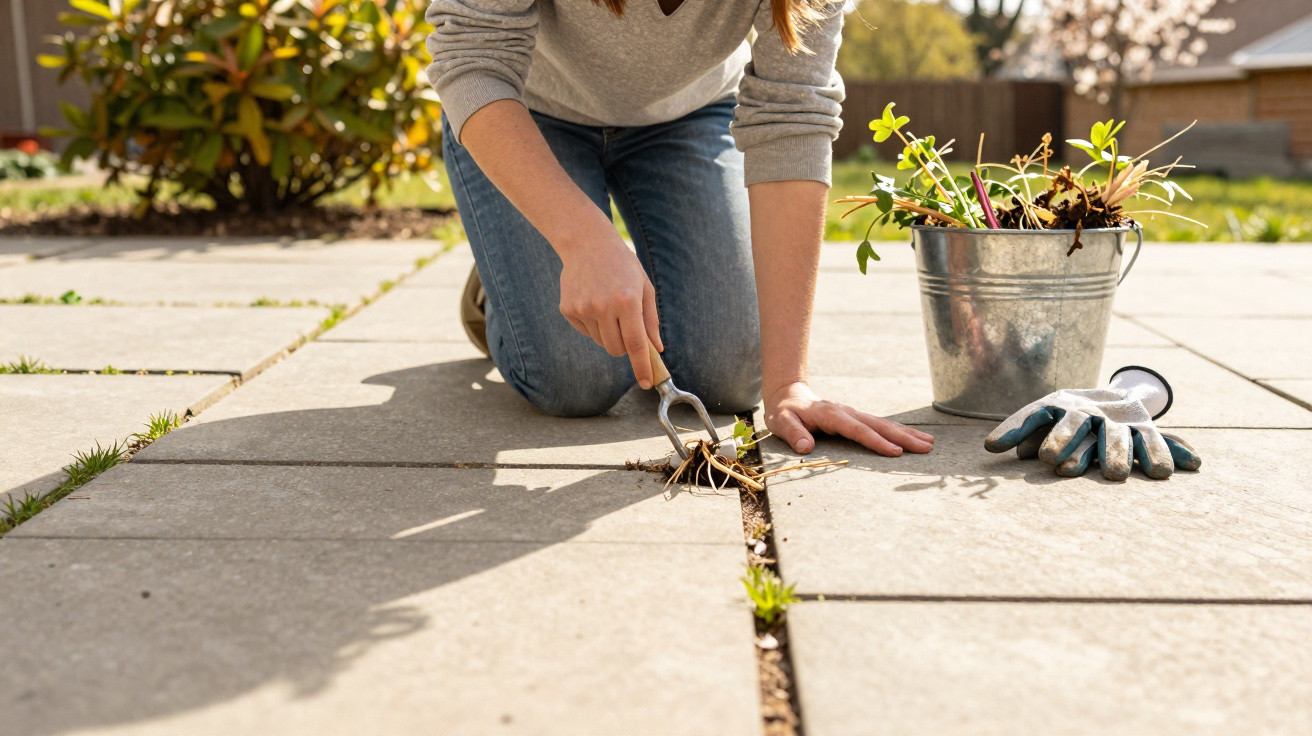
If you tackle weeds in paving joints early in the year with vinegar, a brush or hot water, you will often face the same frustrating sight: no sooner have you straightened your back than fresh green shoots push up between the stones. In most cases, the real mistake is neither the tool nor the home remedy, but the timing. Ignore the calendar and you are virtually scheduling the next weed-removal session yourself.
The real reason weeds return so quickly
Typical joint plants, including dandelions, chickweed and thistles, grow between patio slabs and paving stones. They may appear harmless above ground, but their survival depends chiefly on their roots. Species with a so-called taproot are especially persistent.
A dandelion's root extends to an average depth of around 15 centimetres. If you simply pull off the stem just above the joint, in the worst case you remove only about ten per cent of the plant's total mass. Everything else remains hidden underground.
“When its top is torn off, the plant responds by producing stronger new growth – the weed returns denser and more vigorous than before.”
Gardening associations and specialist bodies therefore specifically advise removing roots as completely as possible. Yet even the ideal tool will only work properly when the timing is right and the ground conditions are favourable.
Why spring is the wrong time – at least until mid-May
Many people reach for a joint scraper as early as March or April because the first green shoots are already irritating. That is precisely what causes the disappointment. During these months, sunshine, showers and cold snaps alternate. Biological treatments such as vinegar solutions, plant infusions and other contact treatments are highly susceptible to rain.
These household remedies work only at the surface. To damage the plant, they need to remain undisturbed on the leaves for several hours. Rain falling within two days simply washes them away. The result is considerable effort with barely any effect.
“Anyone who starts too early is mainly tackling the symptoms – and unknowingly preparing for the next round in two to three weeks.”
The ideal spring period: after the Ice Saints
It makes far more sense to schedule the main spring treatment for the second half of May, after the traditional Ice Saints period around 11 to 13 May. From then on, longer, settled dry spells are much more likely.
For genuinely effective use of household remedies or biological contact treatments, observe the following points:
- Check the weather forecast for at least five days.
- Aim for a period of at least 72 hours without rain.
- Treat only when both the joints and leaves are completely dry.
- Work in the morning where possible, so that sunshine enhances the effect.
A simple practical test can help: place a tissue on the joints. If it remains completely dry for several minutes, the surface is ready. If it becomes damp immediately, it is not yet worth treating.
Do not miss the autumn window: when you can really target the roots
The second key period falls in late summer and autumn, roughly from early September to the end of October. At this stage, many plants store sugar and nutrients in their roots to survive the winter.
Removing weeds together with their roots at this point targets precisely those reserves. The plant has substantially less energy for a fresh start in the following spring. In practical terms, the joints stay visibly cleaner for longer and the intervals between treatments increase.
How to remove roots properly from paving joints
For the autumn treatment, a little manual work is worthwhile. Special joint knives or a narrow root fork, like those often used for asparagus, are ideal.
The key steps are:
- Work after rainfall or thorough watering, when the soil is loose.
- Push the blade vertically into the ground directly beside the stem.
- Use gentle leverage to lift the soil and root from the joint in one piece.
- Then remove moss residues and fine debris with a wire brush.
- Refill the joints with clean sand and sweep it in thoroughly.
Filled joints offer considerably less opportunity for new seeds. Where there is no loose cavity, seedlings find it much harder to establish themselves.
What you should never use between paving slabs
Out of desperation, many people turn to household products from the kitchen. Table salt is particularly popular. At first glance, the effect can seem convincing because the leaves wilt quickly.
“Salt does not merely dry out plants; it permanently alters the ground – and damages joints, stones and neighbouring surfaces.”
Over time, the salt seeps deeper down, draws water from the ground and worsens its structure. The consequence is that the base beneath the slabs becomes hard and brittle, joints crack more quickly, and the whole surface loses stability in the long term. In addition, salty drainage water can contaminate nearby beds and even groundwater.
Another common mistake is spraying shortly before forecast rain or directly onto wet ground. In that situation, every treatment – including biological ones – simply runs into the next gaps or down the drain without properly reaching the plants. You spend time and money without gaining any real benefit.
How to plan paving-joint management throughout the year
Remembering two fixed dates makes the work considerably easier:
| Period | Aim | Method |
|---|---|---|
| Second half of May | Severely weaken green growth | Dry joints, contact treatment or hot water, make use of sunshine |
| September to October | Target roots and reserves | Lever out roots, clean joints and fill with sand |
Between these periods, short inspection rounds are generally enough, allowing you to remove individual plants immediately by hand or with a knife. Anyone who consistently follows this rhythm needs fewer major clear-outs and does not have to start again from scratch across the whole patio every spring.
Preventing damage to paving and saving work
In addition to choosing the right season, the construction of the surface also matters. Wide, deep joints filled with loose material positively invite weeds. When renovating or building new paving, choosing more tightly jointed surfaces and stable jointing mortar prevents part of the problem from the outset.
For existing patios, gradual repair is worthwhile: steadily top up loose joints with sand or specialist paving-joint sand, close voids and check for cracks in the sub-base. This reduces the likelihood of strong roots anchoring themselves deeply.
Avoiding chemical treatments protects not only insects and soil life, but also you and your pets. A carefully planned calendar with two key dates each year, combined with a few targeted manual tasks, replaces the pesticides once commonly used surprisingly well – while keeping patios and driveways free of green growth for noticeably longer.

Comments
No comments yet. Be the first to comment!
Leave a Comment