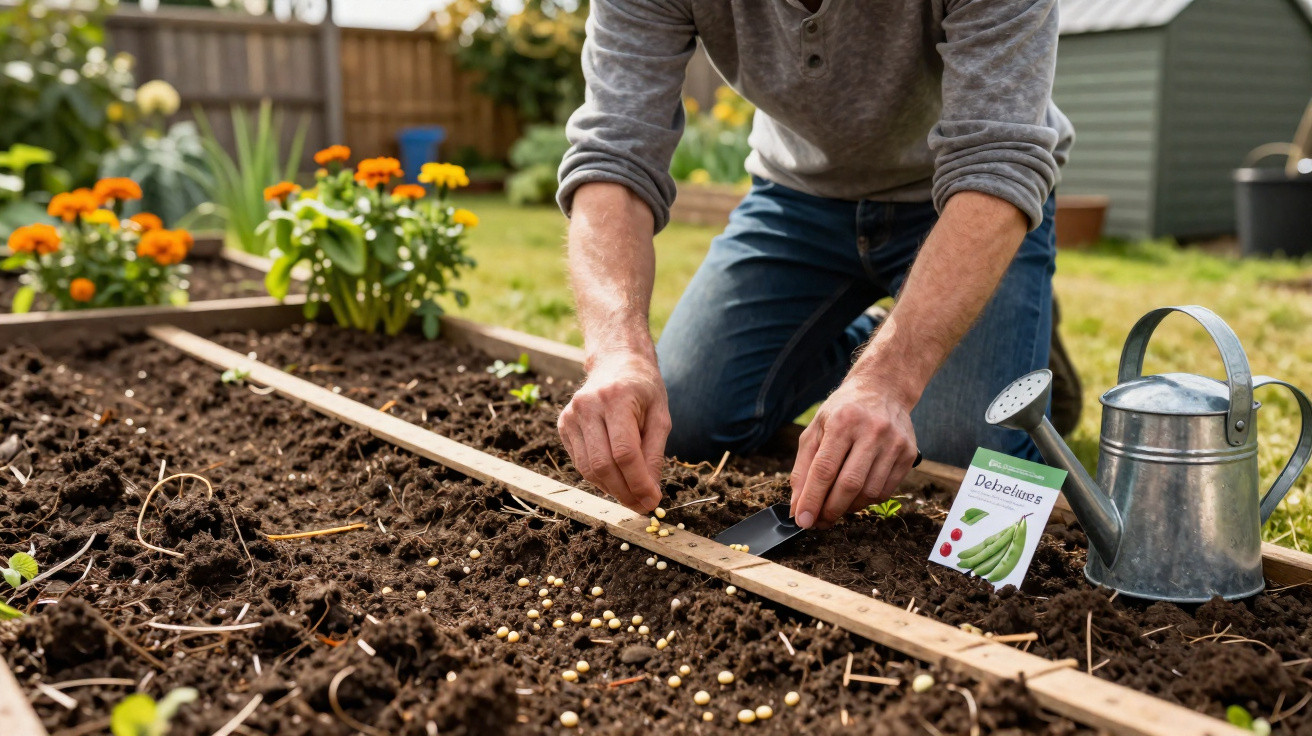
Dwarf beans may seem straightforward to grow, but they are sensitive to cold and wet conditions. Sow them too early and you can lose several weeks-or the entire crop. Prepare the soil properly, monitor temperatures and plan wisely, however, and you can be rewarded with full bowls in a remarkably short time.
Why timing is crucial for dwarf beans
Dwarf beans are among the staples of the vegetable garden. They grow quickly, take up little room and produce generous yields. The catch is that these plants are particularly susceptible to frost. In cold, wet soil, the seeds may rot before a shoot has even appeared.
“Dwarf beans are sown according to soil temperature, not the calendar-that is the secret to a quick harvest.”
The soil needs to be at least 12°C, although around 15°C is preferable. At these temperatures, the beans germinate within a few days and grow at an impressive pace: only about two months often pass between sowing and the first harvest.
The right sowing time for each region
Rather than relying on the month alone, consider both your region and the microclimate in your garden. Gardeners in the south can start considerably earlier than those in cool upland areas.
Warm, southern locations
In particularly mild places where the soil warms up quickly, the season often begins in late March or April. The ground is frequently dry and warm enough at this point, provided that the risk of frost has largely passed.
- First sowing: late March to April
- Further sowings: possible until the end of July
- Early harvest: from late May/June
Temperate regions and mid-altitude locations
Across many temperate areas, the best sowing dates fall a little later. Sticking to this period greatly reduces the likelihood of rot and cold damage.
- First sowing: roughly late April to late May
- Final sowing: until the end of July, occasionally early August
- Example: sowing in early May – harvesting begins in early July
Cool regions, upland areas and exposed climates
In northern or eastern areas, as well as at higher elevations, it is better to delay sowing. Patience pays off here, because an early start rarely results in an earlier harvest.
- First sowing: usually late May to early June
- Main window: June to the end of July
- Example: sowing in mid-July – harvest in September
The basic principle is simple: sow only when the soil consistently feels warm. If in doubt, use a basic soil thermometer or rely on experience: once tomatoes can remain outdoors permanently, dwarf beans will be happy too.
Preparing the soil for fast germination
Dwarf beans prefer loose, well-aerated soil that warms up quickly. Heavy ground prone to waterlogging slows their growth and raises the risk of rot.
- Loosen the soil deeply, for example with a garden fork or cultivator
- Do not turn the entire soil over; simply break it up
- Carefully loosen any compacted patches
- Do not work fresh farmyard manure into the soil immediately before sowing
Dwarf beans are legumes. Their roots host bacteria that capture nitrogen from the air, allowing the plants to provide themselves with some of their nutrients. Heavy applications of nitrogen-rich fertiliser upset the balance of soil life and are unnecessary here.
“When you sow dwarf beans, you save on fertiliser-the plants supply themselves with part of their nitrogen.”
Step by step: sowing dwarf beans in a bed
Once the soil has been prepared and warmed sufficiently, it is time to sow. The process follows a simple pattern.
Making rows and keeping the correct spacing
Start by drawing shallow drills in the soil. There is no need to make them deeper, as dwarf beans germinate better when they are not buried too far down.
- Drill depth: 3 to 5 centimetres
- Spacing between rows: 40 to 50 centimetres
- Spacing within the row: 5 to 10 centimetres between seeds
Alternatively, sow in small clusters, sometimes called nests or packets:
- 4 to 6 seeds in one spot
- Spacing between clusters: about 30 centimetres
Once the beans are in place, cover the drill with fine soil and firm it gently. This creates good contact between seed and soil, helping germination.
Watering properly and protecting young plants
Water matters from the moment of sowing. The drills should be thoroughly moistened, but the seeds must not be left sitting in water.
- Moisten the soil in the drill before sowing
- Water gently once more after covering the seeds
- Later, water only around the roots rather than over the foliage
Beans are especially vulnerable to drought while flowering and forming pods. An even water supply during this period has a direct effect on yield.
When plants are around 15 to 20 centimetres tall, a small task can make a major difference: draw loose soil up around the stems and spread a mulch layer between the rows, using grass clippings, chopped straw or leaves. This supports the plants, retains moisture in the soil and prevents it from drying out too quickly.
How quickly dwarf beans are ready to harvest
Once the seeds are in the ground and the soil is warm enough, progress is surprisingly rapid. The first seedlings usually emerge after just five to ten days. Further growth then depends heavily on warmth and water availability.
| Stage | Approximate timescale |
|---|---|
| Germination | 5–10 days after sowing |
| Leaf and shoot growth | 2–4 weeks after germination |
| Start of flowering | around 4–6 weeks after sowing |
| First harvest | approx. 50–60 days after sowing (dwarf beans) |
Dwarf beans are among the quickest vegetables to grow in a bed. On average, the first pods can be picked 50 to 60 days after sowing. Climbing beans take a few days longer, but crop for longer and grow upwards.
“Anyone who plants a fresh bed of beans every two weeks will have fresh pods all summer.”
A tried-and-tested approach is to sow dwarf beans at the beginning of the season, as they crop sooner. Sow climbing beans at the same time or slightly later; they will work their way up a support and often continue producing into autumn. This creates a long succession of beans from early summer through to late summer or early autumn.
Harvesting correctly so plants keep producing
The more regularly dwarf beans are picked, the more pods they form. Leave pods too long and they mature, becoming tough and stringy-and the plant slows production.
- Pick pods while they are tender and snap easily
- Harvest every two days when the plants are cropping heavily
- Remove overripe, thick pods as well, even if they are no longer destined for the kitchen
This keeps the plant in “production mode” and supplies the garden with fresh produce for weeks.
Common mistakes-and how to avoid them
Many problems in a bean bed have a simple cause. Knowing these pitfalls can save a great deal of frustration.
- Sowing too early: the soil is too cold and seeds rot-sow later instead, when they will germinate promptly.
- Excessive wetness: avoid waterlogging and do not sow in hollows; slightly raised beds are a better choice.
- Too much nitrogen: excessive fertiliser produces lots of foliage but few pods.
- Irregular watering: severe dry spells result in misshapen or bitter pods.
Practical additions: companion planting, risks and storage
Dwarf beans fit well into a thoughtfully planned vegetable bed. They work alongside many vegetables and can even improve soil structure over time.
- Good neighbours: brassicas, beetroot, salads, cucumbers
- Less suitable immediately alongside: onions and garlic
- As a preceding crop: radishes or spinach, which are harvested early
Diseases occur mainly where plants are crowded and poorly ventilated. Adequate row spacing, dry leaves and a site with airflow all significantly reduce the risk of fungal problems.
To preserve part of the crop for winter, briefly blanch trimmed pods in boiling water, cool them rapidly and freeze them in portions. This largely retains their colour and bite-and means the short growing season continues to pay off well into the colder months.
Ultimately, planned bean growing pays twice over: gardeners who keep an eye on soil temperature, sowing windows and care will harvest not only quickly but consistently for weeks. For many home gardeners, dwarf beans are therefore among the most dependable choices when a vegetable bed needs to deliver results at record speed.


Comments
No comments yet. Be the first to comment!
Leave a Comment